 In a previous post a commentator was explaining his typical web-stack deployment, and boasting about how he “can roll this out on Debian in less than 4 hours”. Now he’s talking about provisioning, installing the OS, installing the services, and configuring everything. That’s easily a day’s work for a capable sysadmin in a corporate environment. At least, it is in my experience. So 4 hours sounds pretty good, doesn’t it? I tell you what, go find your nearest admin and ask them how long it would take for them to get a new WordPress site up and ready for you to start posting to. No really, I mean it, go ask. I’ll wait.
Back? Good. I’m betting that, for many of you, the answer was a day or less, depending on their backlog of work. A lucky few would be able to get their new site in an hour or two. Not bad. But if you were using Ubuntu and cloud technology, you would have had your new site ready in the time that it took you to get that answer.
You think I’m exaggerating? You can get a new world-accessible WordPress site up and running in less than 10 minutes. That’s not marketing hype, Canonical is quite literally putting it’s money where it’s mouth is, by paying for an hour of Ubuntu Server on Amazon’s cloud service. Go to http://try.cloud.ubuntu.com and follow along, and you’ll have a WordPress site up and running in less time than it’ll take you to finish reading this article.
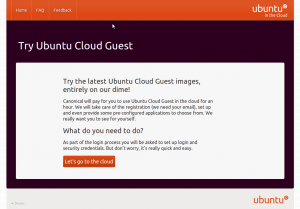
Welcome to the Try Ubuntu project. Yes, we really are footing the bill for this, it won’t cost you a dime. Click that large inviting “Let’s go to the cloud” button to start your adventure in cloud computing.
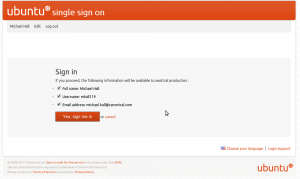
You will need to sign into Ubuntu SSO, because while we’re perfectly happy to pay for one hour, we do need to prevent abuse. Requiring a login lets us limit this to once per user. If you don’t have an SSO account you can create one now, and really if you’re going to spend any time at all with Ubuntu or the community, you’re going to want one soon or later anyway.
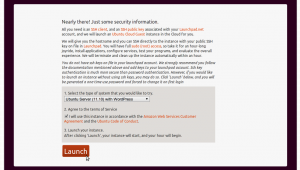
Ubuntu SSO lets you decide what detailed information to send back to any requesting web service. You don’t have to send any of these details back to use this service, but if you have a Launchpad profile and uploaded SSH keys, you’ll get a better experience if you send at least your username.
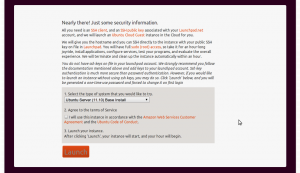
Next you’ll get to choose what you want running on your trial instance. You’ll also have to agree not to be abusive with your instance, do anything illegal, or generally cause other people problems as a result of our generosity. Seriously, just don’t do it.
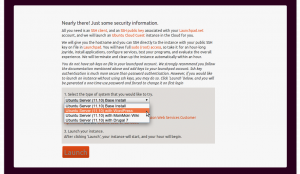
Currently we offer a base Ubuntu Server, running just the default installation, as well as the base server plus WordPress, Drupal or MoinMoin. These aren’t pre-made images, they’ll be installed after the new server is provisioned, just like you would do manually, only thanks to cloud-init, we have it all automated. You will use the same Ubuntu Server AMI regardless of which service you choose.
That’s all you need to do! Now click the “Launch” button and the website will ask for a new m1.small instance through Amazon’s EC2 API. This API is available to anyone, by the way, so you can script your own cloud deployments in exactly the same way. We are using the boto python library to access the API from within Django.
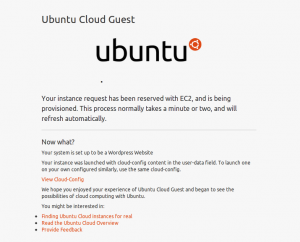
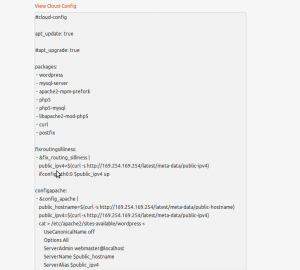
After we get an instance reserved, we have to wait for Amazon to start it. It only takes about a minute for Amazon to start up your new instance. In the mean time, this page will periodically refresh itself, and will let you know once your instance has started. Did you notice that “View Cloud-Config” link?
This is what will be run on your new instance as soon as it’s ready. You can copy this script, and use it later to start up your own permanent Ubuntu Server instances on AWS or any other EC2 compatible cloud host. It is this script that will install Apache, MySQL and WordPress, configure them all properly, and get them all running.
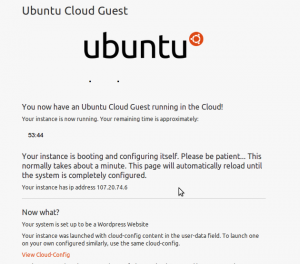
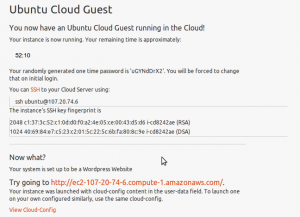
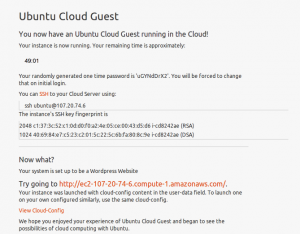
Now your instance has started, and so has your countdown clock. At this point Ubuntu is fully booted, and your cloud-init script is busy installing all the packages and dependencies needed to run WordPress, all you have to do is sit back and wait. Deploying is hard work huh?. Don’t worry, I won’t tell your boss.
Hope you didn’t get too comfy, because 3 minutes later and we’re done! Here you’ve given the command to SSH into your new instance. If you’re running this from Windows, you’ll need to get something like PuTTY, because last time I checked Redmond still thinks that unencrypted Telnet is a good idea. Trust me, you want SSH.
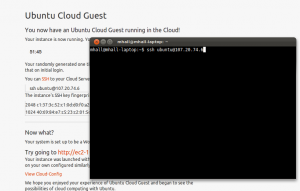
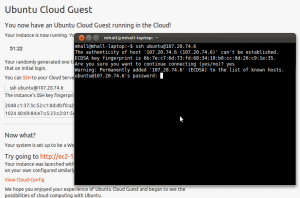
So fire up a terminal (yes, a terminal, you’re in server-land now buddy) and copy/paste the ssh command to get connected to your new instance.
Next you will be prompted for your password, it’s back on the web page, just copy/paste it into the terminal. Remember how I said earlier that having a Launchpad profile with uploaded SSH keys would give a better experience? Well if you’ve got all that, then you won’t see this step. You see, part of the initialization that happened when your new instance started was to download your public SSH keys from Launchpad, allowing you to use your private SSH keys for authentication. Nice huh?
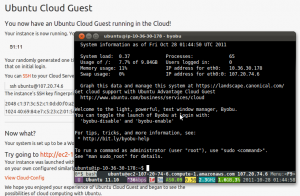
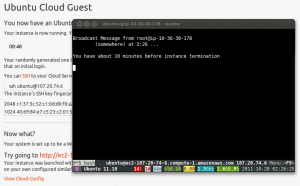
So now you’re connected to your new instance. But what’s all that stuff at the bottom of your terminal now? That my friend, is Byobu, Ubuntu’s highly customized profile for GNU Screen. Describing all of it’s wonderful goodness would take another full blog post, so I’ll just point out the highlights. F2 creates a new “tab”, and you can switch between them with F3/F4. Down at the bottom are some system monitoring widgets for things like load and memory usage. In green characters is a special widget for Amazon EC2 that gives you an estimate of how much your instance is costing you (a whopping $0.09 USD at this point), and in blue characters is a clock showing how long your trial has been running (so you’ll know how much of your 55 minutes you have used).
Alright, your instance is running and configured, now what? Well, did you see that link on the web page?
That one, next to “Try going to”. Click on it.
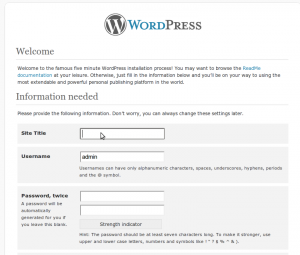
Well look at that, it’s your new WordPress site, just waiting for you to give it a name (and also username and password). No unzipping, copying, apache configs, database setup, nothing. We literally can’t make it any easier.
So pick a name, give it a password and email, and you’re all set! Yes, I know my password was weak. Actually my password was ‘password’. Hey, it was only up for 55 minutes, I’m not going to spend extra time thinking of a secure password. Come on, we’ve got a WordPress site to play with!
There you are, your new WordPress site is deployed. And how are we doing on time? Well if you hadn’t spent so much time reading along with this article, you’d have at least 45 minutes left out of the original 55. Heck, I wasted a bunch of time taking screenshots along the way, and I still had more than 40 remaining. How far do you think your sysadmin would have gotten in this same amount of time? He probably just got back form refilling his coffee (which, to his credit, really is necessary before attempting a deployment the old fashioned way).
After a while, as you get close to the end of your trial period, you’ll get these helpful messages in your terminal session, letting you know how much longer you have. And before you start thinking that you can use your mighty sudo powers to stop your instance’s termination, sorry pal, but we keep track of them on our end too, and your instance will be killed through the same EC2 API that launched it. But I sure hope you had fun.
So now you’ve seen how fast and easy it is to deploy not just Ubuntu Server in the cloud, but actual, useful services running on top of it. We offer you three popular software packages for websites, but those are only the tip of the iceberg. You can write cloud-init scripts for anything you want to deploy on Ubuntu, even your own in-house build applications. Then you too can deploy into the cloud with the click of a button.
What’s that you say? You don’t have a handy dandy webapp for one-click deployments into the cloud? Oh but you do! You see, everything you just saw is open source, you can download it from lp:awstrial on Launchpad. Use it to run your own trials, or just to learn how we did it so you can write your own internal provisioning service. It defaults to using Amazon’s EC2 cloud, but you can point it to any EC2 compatible cloud. We ran it internally against an OpenStack EC2 cloud during development and testing.
Did you enjoy your trial? Leave us some feedback on what you liked, what you didn’t, and what you want us to offer in the future.
